Kids love crafts and Easter crafts are especially fun for the family.
A couple of the crafts our craft department came up with is fast and easy which makes it perfect for inexperienced hands or young attention spans.
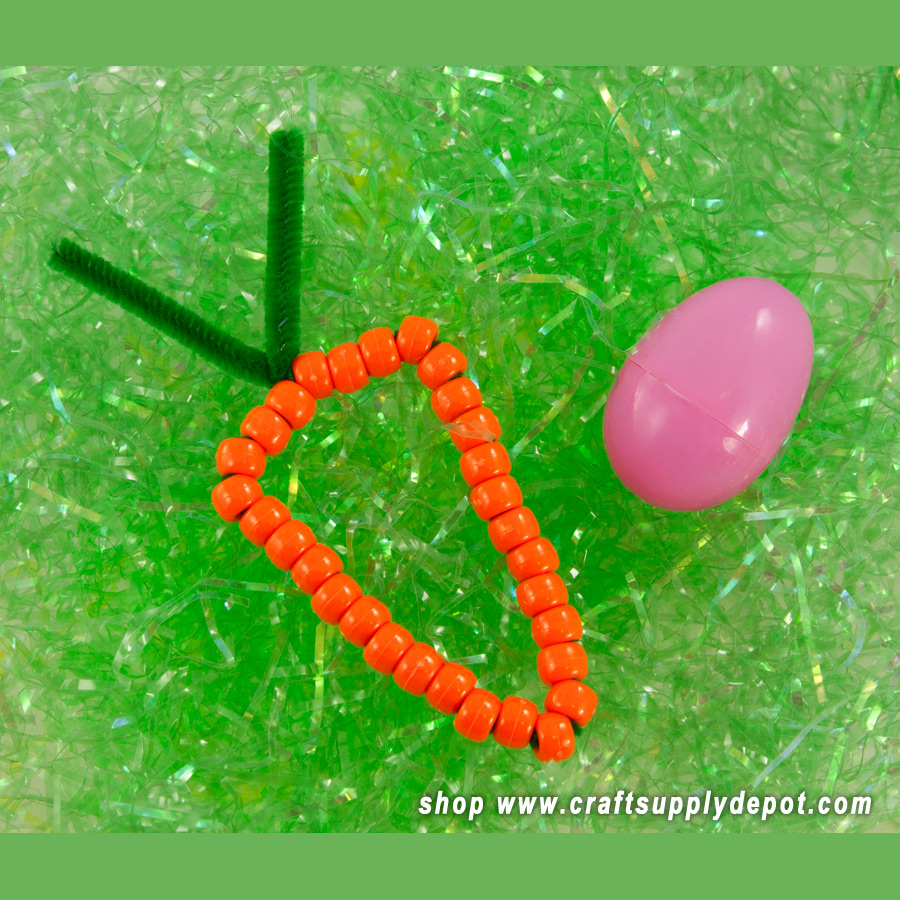
For this craft we took a green pipe cleaner and threaded on 30 orange pony beads. Once you have added your pony beads fold your pipe cleaner in half, dividing the beads in half. Count 4 beads from the end and bend inward to form the top of the carrot. Twist the pipe cleaner closed and shape the pipe cleaner ends to form the top part of the carrot. These would make great things to decorate an Easter basket with, add to a greeting card or decorate a cake or cupcake with.
Our next project uses the same concept but this time we created an adorable easter egg! These Easter eggs are both fun and versatile. String them together for a garland, use them to decorate greeting cards or Easter baskets. Think of fun ways you can use them at school parties too.
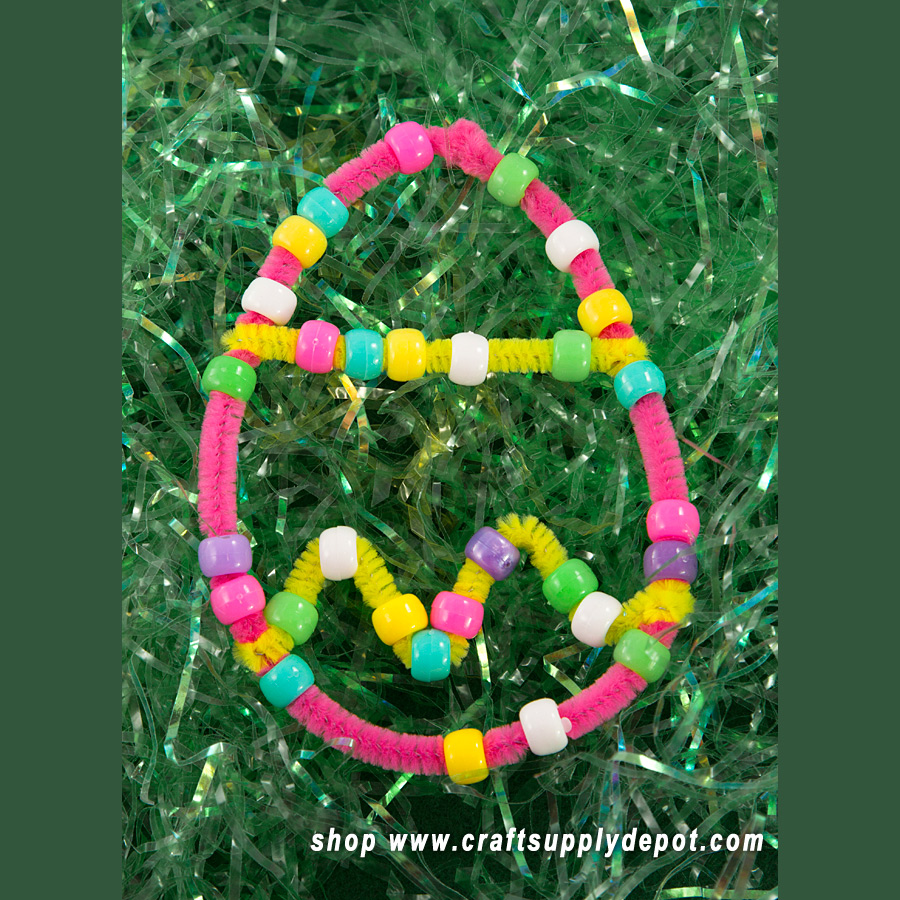
Begin by choosing 2 different colors of pipe cleaners. One will be the egg shape and the other will form the designs in the middle of the egg.
Begin by adding pony beads to your pipe cleaner and then twisting the ends of the pipe cleaner into a circle. Form your circle into an egg shape. Add a few pony beads and bend the second pipe cleaner into a zigzag pattern. Cut your pipe cleaner just a little wider than your egg shape and then bend the ends of your zig zag around the egg pipe cleaner. Make another zig zag in the same manner and attach to your egg shape. Optional: Cut another piece of pipe cleaner and attach to the top of your egg to form a hanger. Or if you would like to make a garland cut a piece of pipe cleaner and attach to the sides of 2 egg shapes. Connect in this manner until the desired length.
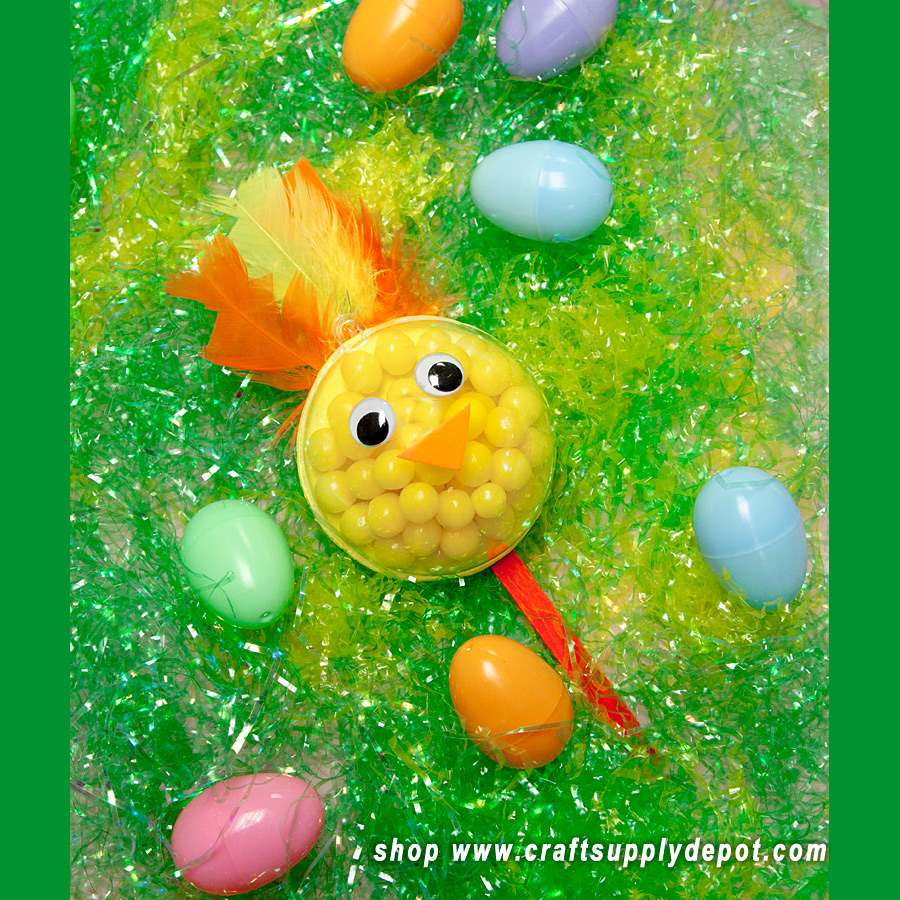
This cute little craft is both fun and delicious! It's like an Easter lollipop without the mess. You will need the following materials:
Paint the popsicle stick on both sides and set aside to dry. Separate the fillable ornament into 2 pieces. Trace around one half of the ornament on the yellow foam sheet twice and cut them both out. Glue the feathers into place on one of the circles and let dry. Turn the ornament half over like a cup and fill with candies. Glue around the outside edge of one of your foam sheet circles and place the foam back onto the ornament and let it dry. Lay a book or something on it to help weight it down.
Lay the craft stick across the back of the lollipop so that the bottom of the stick sticks out directly opposite of the feathers. Glue the stick into place and add glue to the entire back. Place the 2nd circle on top of the craft stick and the circle that you already glued onto the ornament so that it sandwiches the popsicle stick. Turn over and weight it down to dry.
The last part to do is to add your chick's face. Cut a small triangle of the orange foam sheet and place it in the center of the plastic ornament with one of the triangle points facing down towards the popsicle stick. This will be your chick's nose. Now glue the wiggle eyes into place.
So simple, so fun and so so cute!

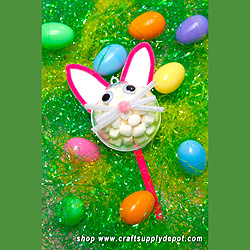
This little bunny lollipop is perfect for Easter baskets or anywhere you want to share the fun of Easter. It is built in much the same manner as the chick in the previous information.
Here is what you need:
Paint the popsicle stick on both sides and set aside to dry. Separate the fillable ornament into 2 pieces and set one half aside. Trace around the other half of the ornament 2 times on the white foam sheet and cut them both out. Cut 2 long oval pieces to be your bunny's ears. Click on the ear pic below to see an enlargement of the ears. I don't think it is made to scale but it will help give you an idea of what you need. I would suggest making the ears just a little taller than your ornament piece. You can always trim them shorter later if you wish.
Turn the ornament piece over like a cup and fill with candies. Add glue to the outside edge of one of your foam circles. Place the foam back onto the ornament and let it dry. Lay a book or something on it to help weight it down so that it seals all the way around.
Lay the ears and craft stick onto the 2nd circle that you cut out so that the popsicle stick sticks out directly below the ears. Glue them into place and let dry. See the pic below for help with placement. Click on it for a larger version.
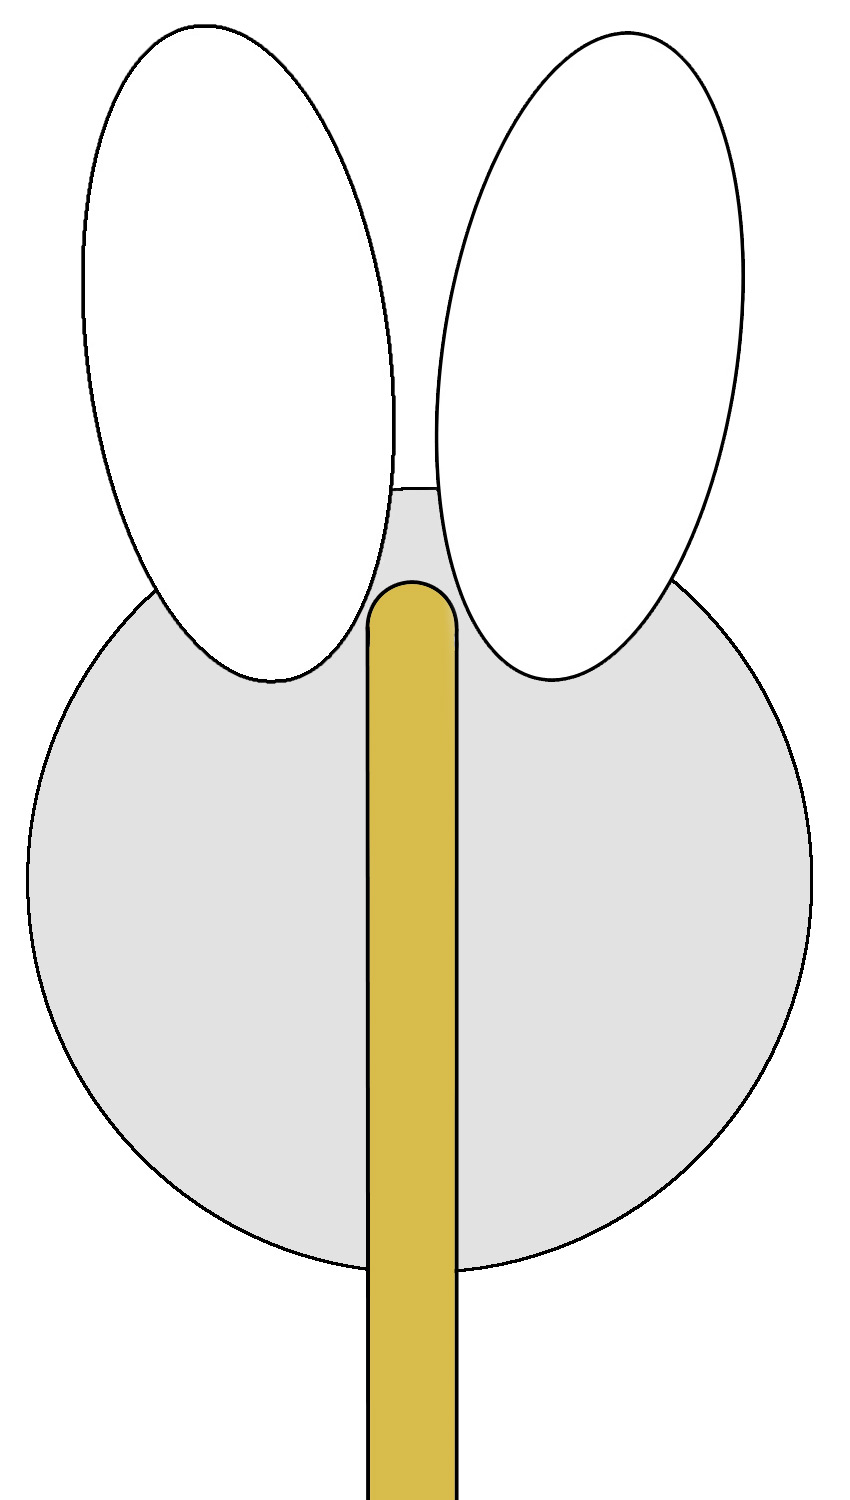
When the ears and stick are dry, bend your pink pipe cleaner around the outside edge of each bunny ear and glue into place. You don't want to extend your pipe cleaners too far into the middle. Let dry. Apply glue to the entire surface of the circle that is attached to the ornament and place the circle with the ears on top of the circle that you already glued onto the ornament so that it sandwiches the ears and popsicle stick between both circles. Press together and turn over and weight it down to dry.
The last part to do is to create your bunny's face. Cut your white pipe cleaner into 3 equal size pieces that are about the same width as your ornament piece. Twist the 3 pieces together in the middle to form the whiskers and hot glue the pom pom to the center. Next, hot glue the whisker piece to the center of the ornament. Now glue the wiggle eyes into place.
This was so fun to make that just writing everything down makes me want to make another one!
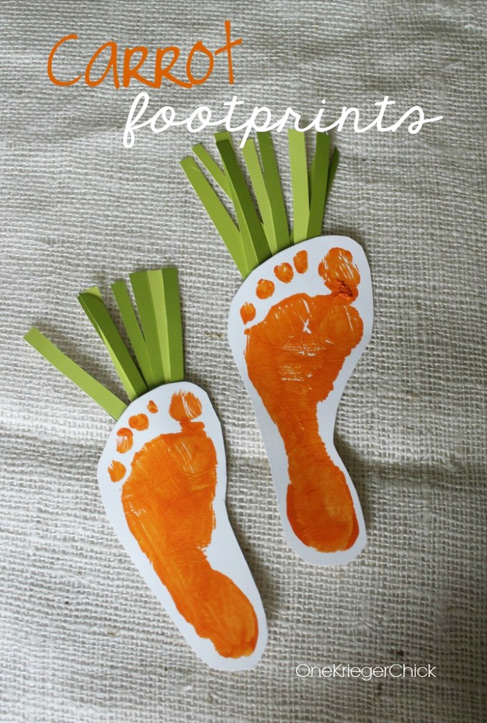
Image Source
We didn't make this one but we fell in love with this idea. Kids will love smearing a little orange paint on their feet. Cut out around the feet and add some shredded green paper to the "top" of the carrot. A cute Easter craft and a keepsake all rolled into one!