1. This is a basic Ladder Pattern if you have ever made ladder projects this will be easy for you to make. Thread 2 size 7 long beading needles with as long of a piece of Nylbond as you can comfortably work with, preferably 70 - 80" in length. Knot the two threads as shown in Fig. 1 (If working with monofilament, cut a piece double the length you are comfortable with and fold it over instead of knotting together.) and thread 3 8mm faceted beads onto needle #1 and 1 8mm faceted beads onto needle #2. Thread needle #2 through bead # 3 on needle # 1 as shown. This becomes the rung as you pull the beads snugly together. Place a drop of white glue on the knot and rub it in. Then pull the knot into the hole of the first bead to tie it hopefully. (If working with monofilament you can omit this glue step as your thread won't have a knot or need to be hidden.) Allow it to dry overnight before clipping the threads the next day on all knots. You can continue to work however, but remember to drop a drop of glue whenever it is necessary to add another thread. (If working with monofilament cord, to end piece of cord, tie off your monofilament at the inside of a bead using a surgeon's knot and dab with your glue. To begin a new piece of cord simply thread through the bead you just ended with.) Continue adding 2 beads on the left hand needle and 1 bead on the right hand needle, crossing through the last bead of the left hand needle always. Look at the main part of Fig. 2 and this should help you to visualize the forming of your ladder. When you have 30 beads on the right hand side, then tie off the strands as shown.
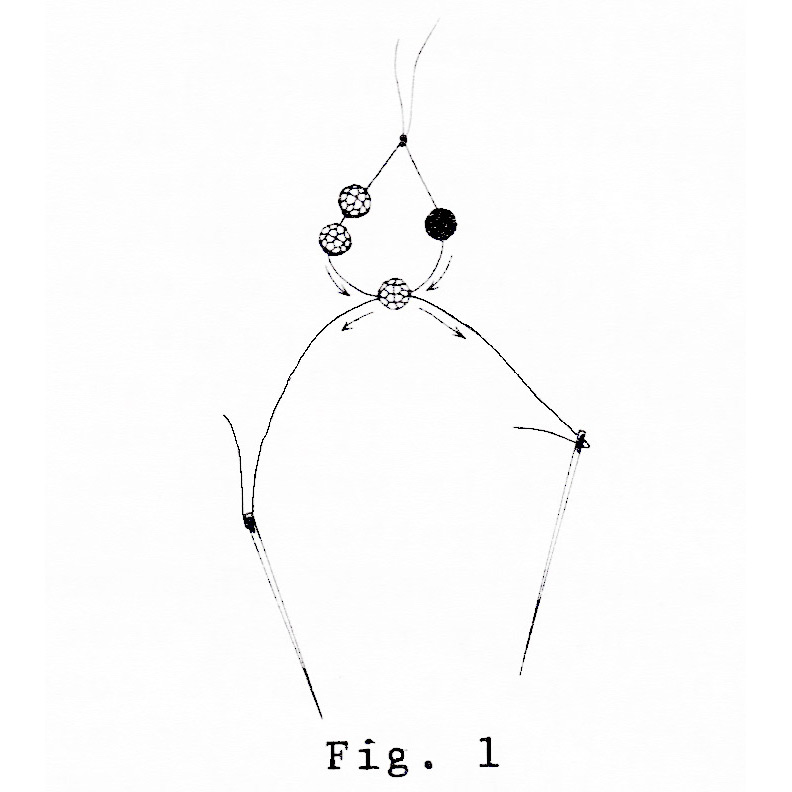 Figure 1
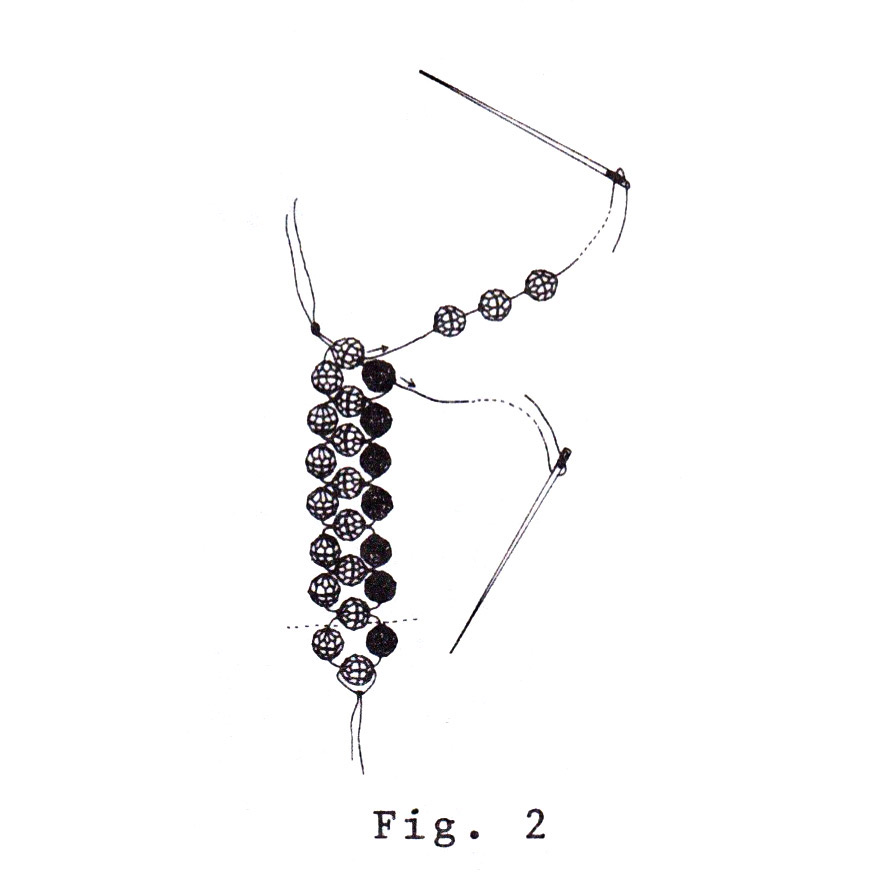
Figure 2
2. In our drawings and in teaching we found it much easier to use 2 colors to make this hanger, and the next step is the main reason. Refer to Fig. 2, thread the two size 7 needles one again with nylbond (or use monofilament cord). Add a drop of white glue, pull the knot in and go through the very top bead as shown and the bead which we show as a different color. This is your left hand needle. Go through the very top bead again, add 3 beads and with the right hand or #2 needle continue through the second colored bead. Pick up needle #1 or the left hand needle and go through the last bead as shown in Fig. 3 pulling it tight. NOTE: ONLY AT THE BEGINNING DO YOU ADD 3 BEADS. REMEMBER THIS ON EACH SECTION YOU MAKE. Pull it tight. Add 2 beads on the right hand needle continuing to pick up the colored bead shown in the other section of your ladder.
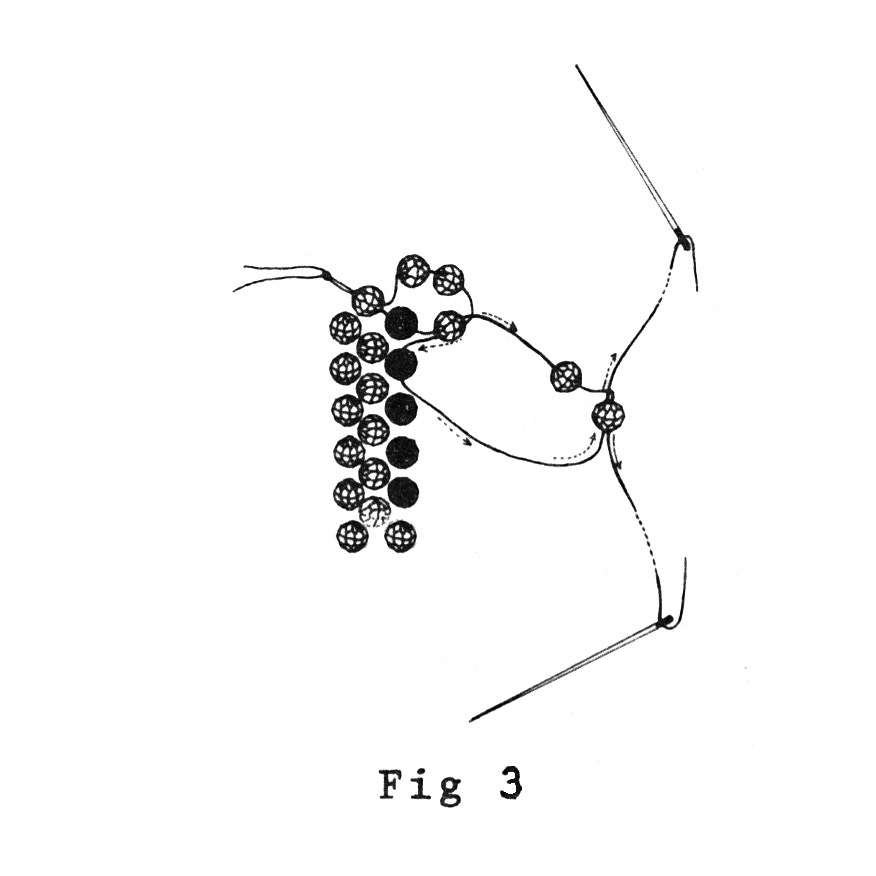
Figure 3
See Fig. 4. Continue working until you have reached the end - 30 beads. Tie off. Make 3 more exactly like this. These are the main supports for your beaded plant hanger.
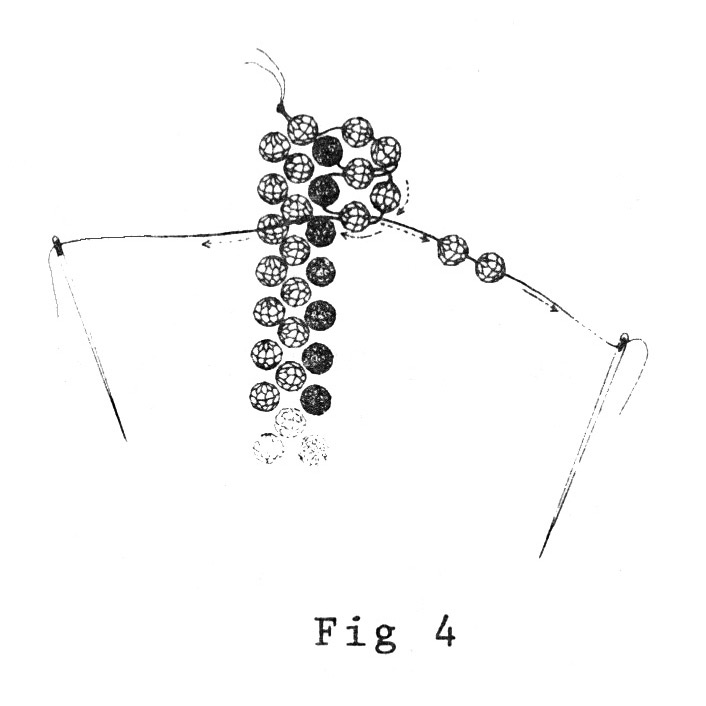
Figure 4
3. Make 2 ladder pieces each 36 beads long, leaving the end open, lay them aside for a moment. Pick up one of your 5" rings which we will now cover with yarn in a double button hole stitch. Refer to Fig. 5 and if you have ever button holed raffia for pine needle work, this will be very easy for you. Otherwise, take a long piece of 4 ply knitting worsted weight yard, fold it in two and make a loop over the ring, pulling both ends through. Put one end o each side, making alternate loops as shown in our drawing until the entire ring is covered. If you run out of yarn, splice by working the new and old piece together for 6 or 7 loops. For smoother work, when you do add more yarn, try to keep your splices so they are at least a couple of inches apart when you do add more yarn. Repeat with the second ring.

Figure 5
4.You are now ready to begin assembling the main body of your beaded plant hanger. Take one of the 36 beads and fit it around the ring stitching it into place. Refer to Fig. 6 at this point. Sew the 4 ladder pieces in place on the collar, spacing them evenly. Repeat with the bottom covered ring, being sure to keep them straight.
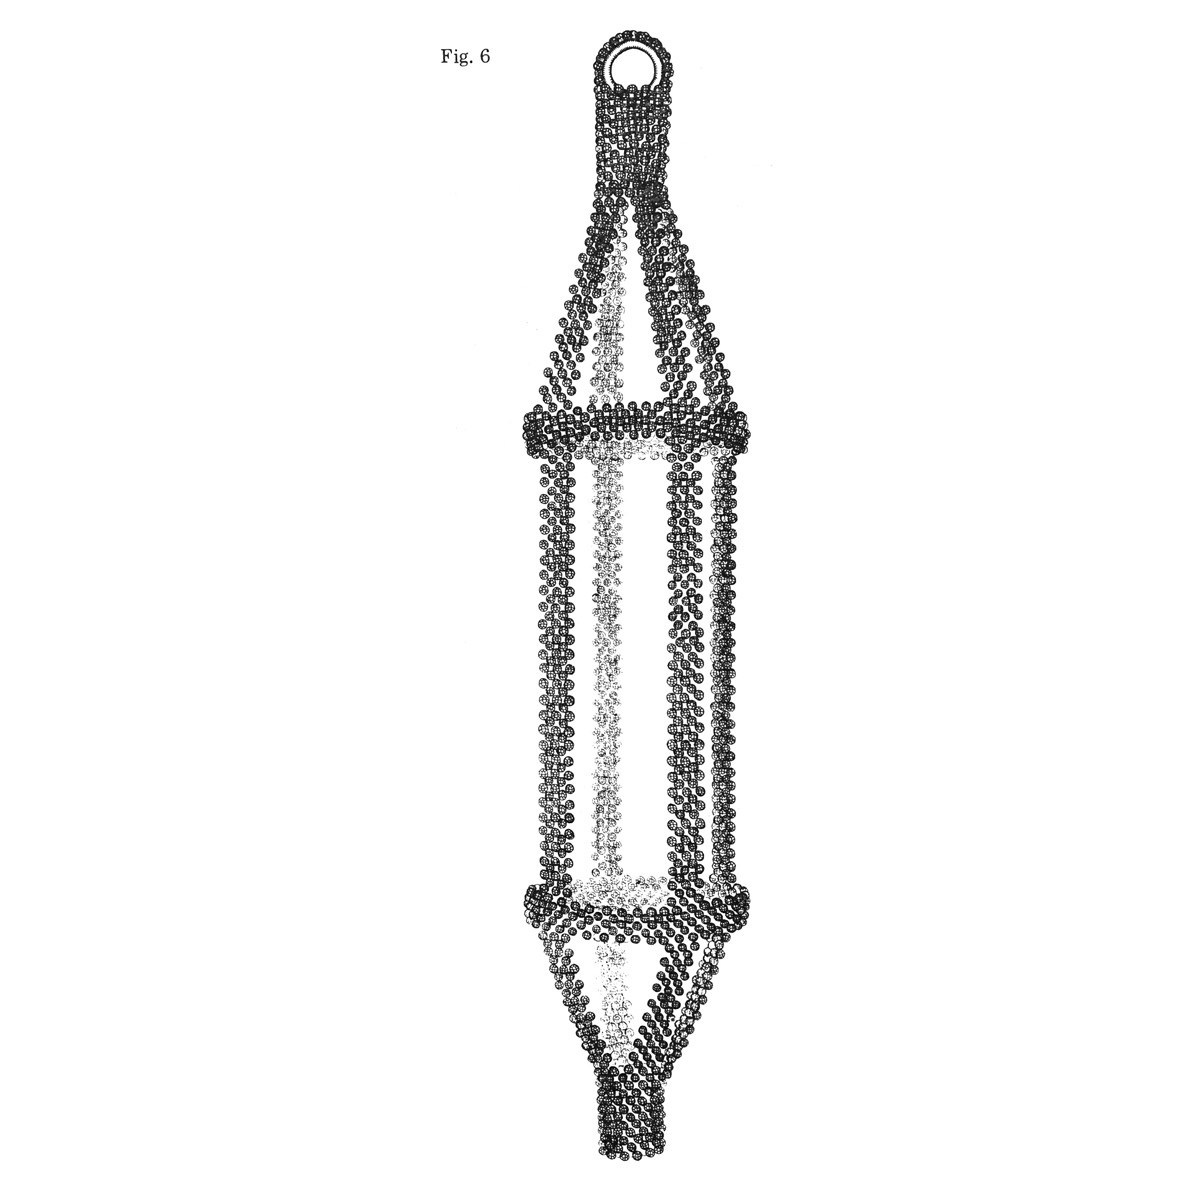
Figure 6
Now you will need 4 ladder pieces each 21 beads long for your top piece and another 4 pieces each 15 beads long for the bottom of your hanger. Sew each of your 21 bead ladders in place exactly opposite the main support ladder. Refer to Fig. 6 & Fig. 8. You are now ready to join your 4 top pieces. Thread your #7 long beading needles, put on an 8mm faceted bead, pull your knot into place and go through a bead on each side of the two pieces you are joining. If you will refer to Fig. 1 and visualize the left and right hand beads as the two in your ladder pieces you will see how this is done. Continue adding a bead in direct descent until you have 7 beads. Tie off. Repeat until you have a solid ring of beads. Look at the drawing on the front of the finished hanger and you are now ready to tackle the hanger at the top. Fold the top piece and anchor your two needles and threads to the 8mm faceted bead which hits on the fold, hiding the knot and making the single ladder 11 beads long counting the first and last bead which you pick up from the solid top. Slip your ring into place and 2ork 4 beads across in the ladder pattern. holding the ring in place and closing the two sides of the solid top.
With the 15 bead ladders, make a solid ring of them at the bottom. The detail in Fig. 8 while showing how to add the last beaded strings, does show how the upper and lower supports appear on the bottom collar. This time you will have only 6 beads joining the bottom ladders.
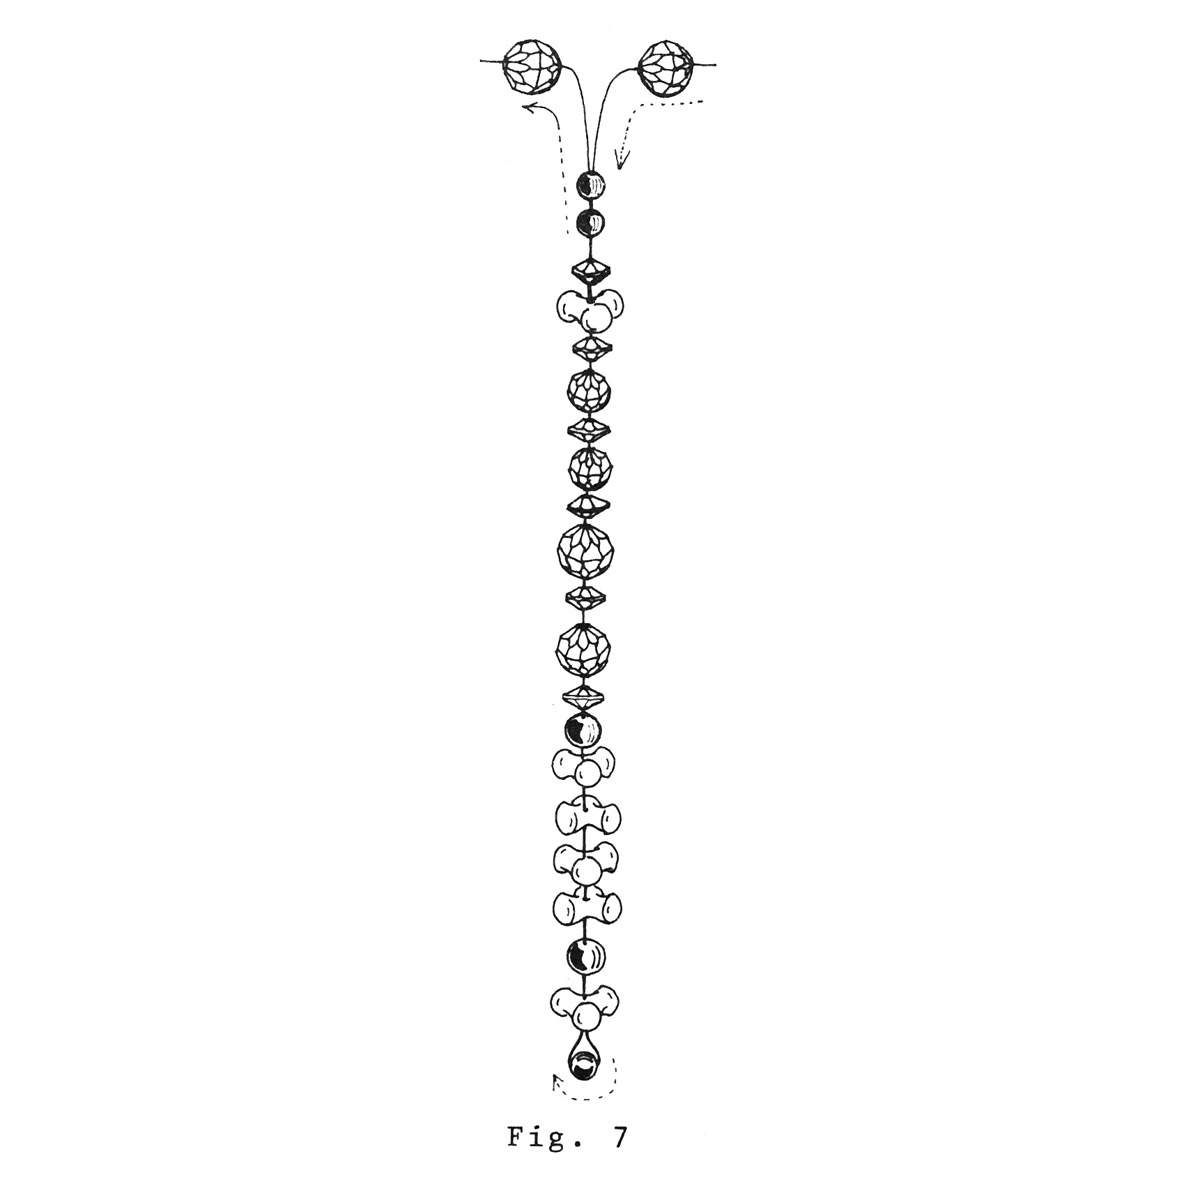
Figure 7
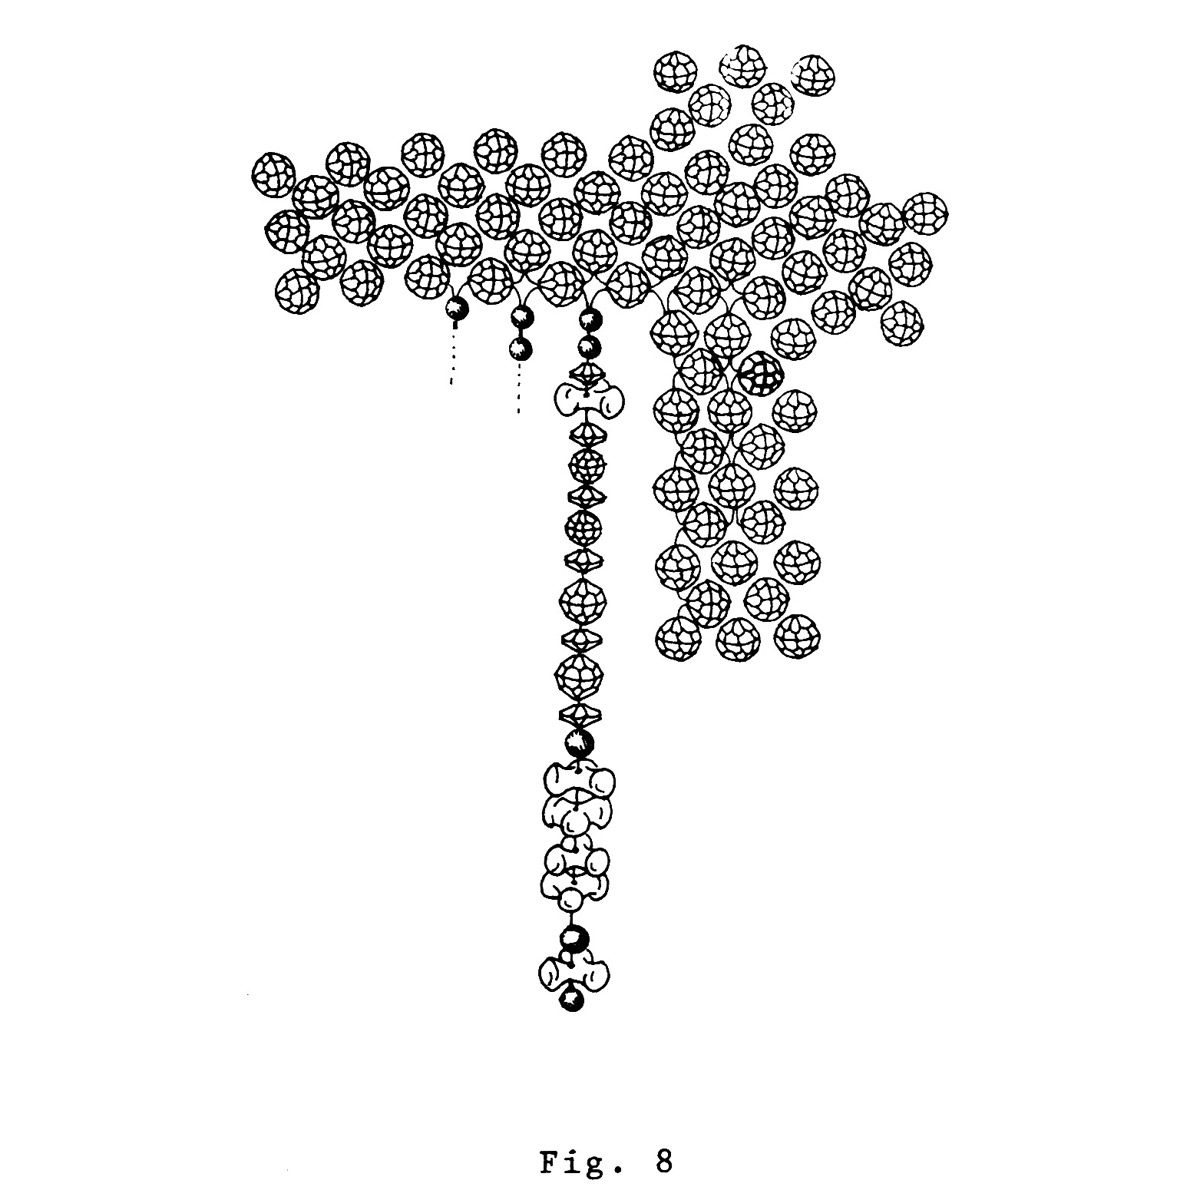
Figure 8
Now you are ready to add your GO-GO STRINGS to each of your collars and to the very bottom of your hanger. Refer to Fig. 7 and to the drawing of the finished hanger at the beginning. Thread a needle and pull your knot into one of the beads on the bottom collar. String your beads in the following sequence: 2 - 4mm gold or silver plated beads, whichever you are working with, a 6mm spacer (rondelle), a tri bead, another spacer bead, a 6mm faceted bead, another spacer bead, a 6mm faceted bead, spacer, 8mm faceted bead, spacer, another 8mm faceted, spacer, 6mm gold or silver plated bead, 4 - tri beads, another 6mm plated bead, a tri bead and a final 4mm gold or silver plated bead. Refer to Fig. 7 and with your needle work back up through all the beads as shown in Fig. 8.
You will need 12 such strings to finish the very bottom of your hanger.
For the top collar you will work 6 strings in between your ladder supports.
On the bottom ring or collar, you will work strings all the way around between every 8mm faceted bead.
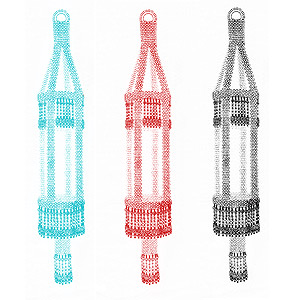
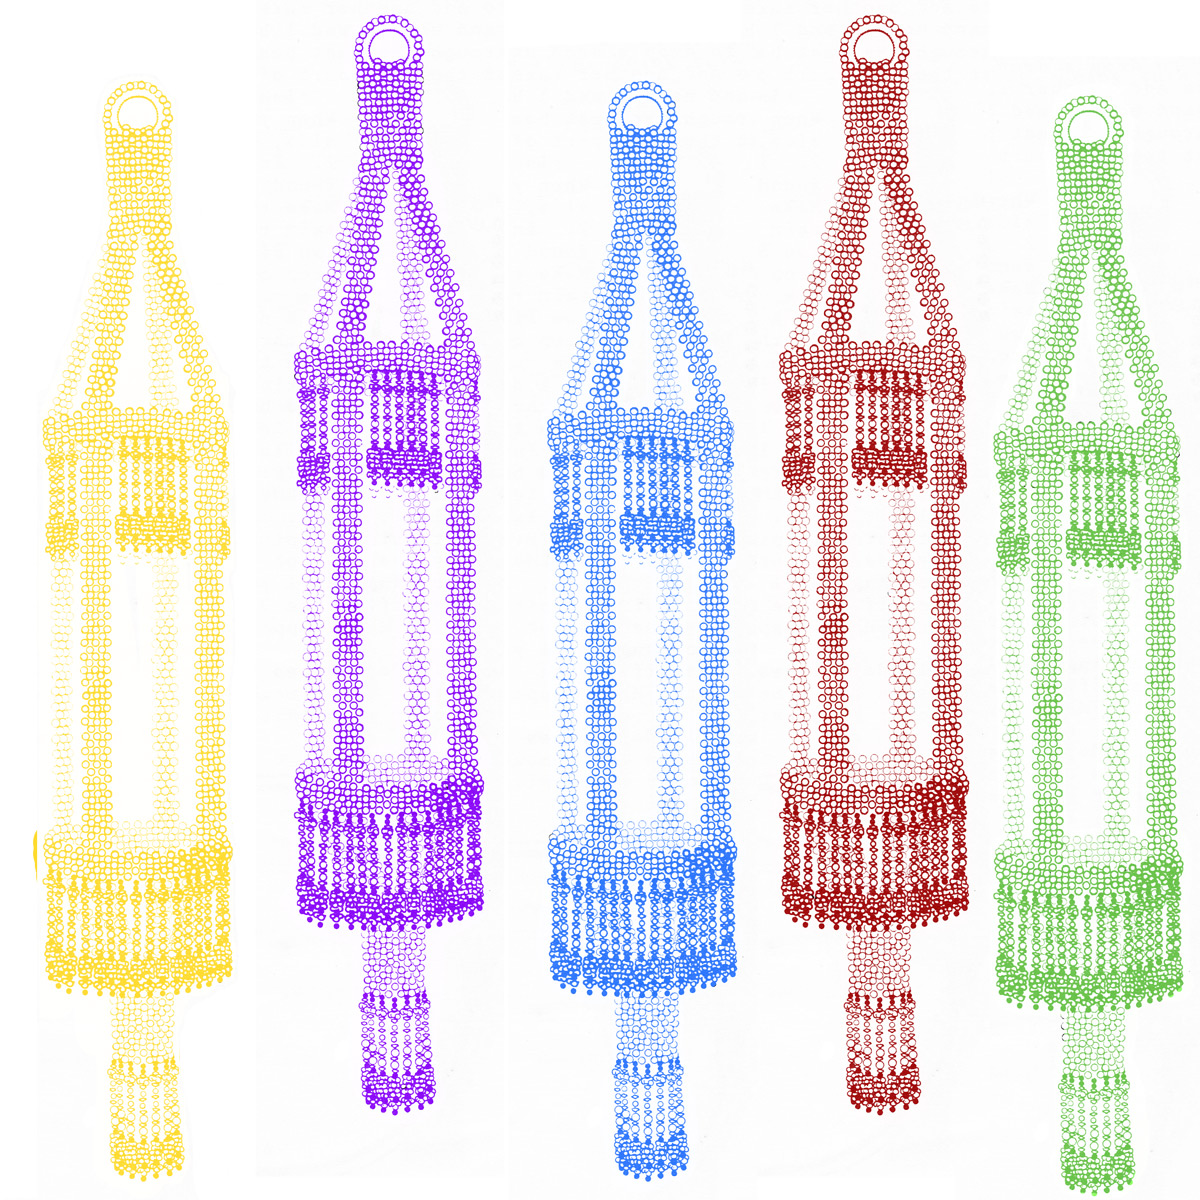
You will be the admiration of your friends and neighbors when they see this lovely hanger in your Family Room with two lovely growing plants in it.
Work this up in any number of brilliant color combinations. It will take approximately 1 lb of the faceted beads alone. We have a sample worked in the Crystal and Orange, one in the Crystal and Amber. Tri this in red and crystal, in hot pink and crystal, in green and crystal . . . it is spectacular in every combination we have seen it.