Refer often to the drawings and this will almost make itself
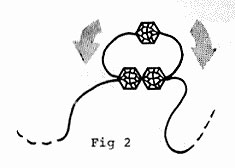
1. Thread 1 - 6mm faceted bead onto one of the 32" pieces of wire. Add 2 more 6mm faceted beads onto one wire (we shall refer to these from here on as separate wires) and bring your other wire through both these beads as shown in Fig 2, as you would in making a ladder pattern.
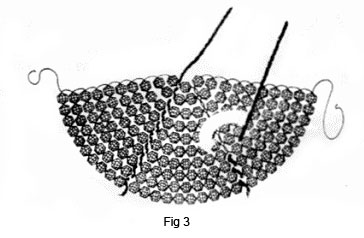
2. The next row, add 3 beads onto one wire, bringing the opposite wire through these 3 beads as you did in the previous step. If you will look at Fig 3 and look at one section, you will notice the looping effect of your wire down the side. Pull your work as tightly as you can without buckling the piece. The first bead will be at the neck edge.
3. Continue working your rows adding 1 bead each row until on your 10th row you end up with a 10 bead row. It will take a total of 55 beads for each section.
4. Make two more sections just like this.
5. Join the sections together twisting your wire together as tightly as possible, then work the loose ends up through the loops of the join.
6. Take one of the Tinsel Stems and wrap it up the juncture as shown in Fig 3. This will become the stem for the head and halo. Join your third section to the first two sections so you have a piece which looks like Fig 3.
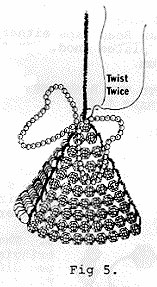
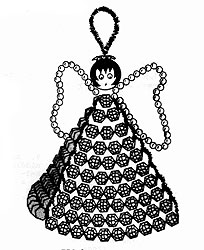
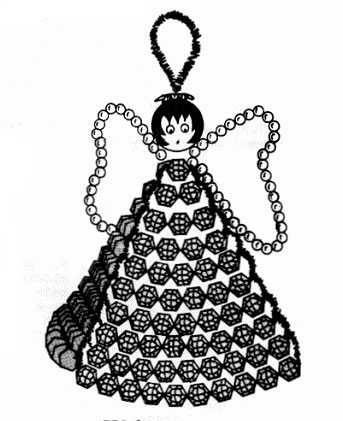
7. Forming a cone, join the first and third sections as in Fig 5 and this becomes the gown of your angel. Put this aside until you have completed the wings.
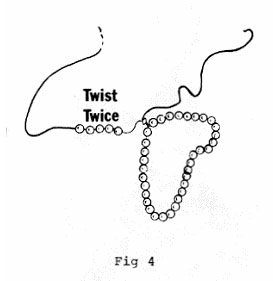
8. Pick up the 12" piece of Size 28 gauge wire and thread 34 of the gold beads onto the wire. Twist this together twice, as tightly as possible. See Fig 4. Now thread another 34 of the same beads onto the remainder of the wire and twist this together.
9. Refer to Fig 5 and keeping a seam in the middle of the back, attach the wing section at the neck by twisting the balance of the Size 28 gauge wire a couple of times around the neck Tinsel Stem. When your angel is complete you can come back and shape her wings.
10. Put a drop of white glue on the wire before each of the next steps.
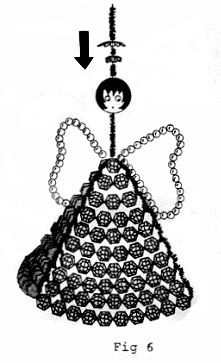
11. Pick up your 20mm wood bead head and slip it down into place on the Tinsel Stem as shown in Fig 6. Slip one of the bead caps into place on her head as shown. Now take the 2nd bead cap and flatten it out and slip this into place on the stem for the top piece of the Halo. Put this aside to dry overnight. The white glue should be a resin type which will dry clear and stay slightly flexible.
After the glue is dry bend the balance of the Tinsel Stem into a hook shape.