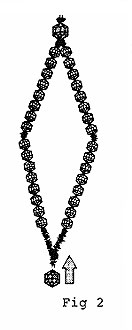
Carefully cut 3 of your Tinsel Stems in 6" lengths. Refer to Fig 2. Thread 16 - 6mm Faceted AB beads onto each of two 6" pieces of Tinsel stem. Allow room enough so that there is a small space in the center of the stem as shown for joining later. Put a drop of glue on the ends and slip an 8mm Faceted bead over each end of both pieces. Set aside to dry. Make 2 more units exactly like this and set aside to dry.
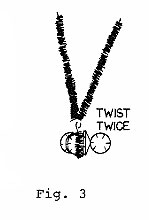
Carefully cut 2 of the 12" Tinsel Stems into 6" pieces again. You will use only 3 of these pieces at this time. Refer to Fig 3. Pick up one of the 6" pieces and twist tightly around the Sunburst bead as shown. Twist twice. Do this again with two more of the 6" pieces, wrapping around another section of the bead.
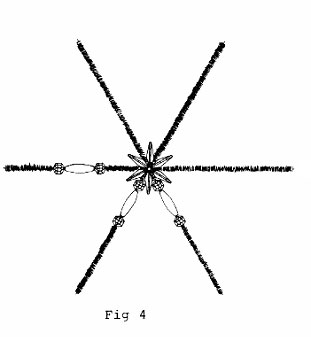
Refer to Fig 4 and begin to thread the beads as shown, putting on first *6mm Faceted AB Bead, AB Spaghetti Bead, drop of glue, 6mm Faceted AB Bead. Repeat from * on each of the other 5 points. Set aside to dry.
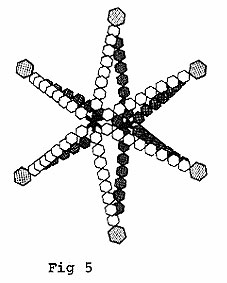
Now you are ready to assemble your Star Ornament. Pick up the 3 units you made in Step 1 and assemble them as shown in Fig 5, slipping one unit into the first one, and while holding it in place slip the third unit inside the other two.
Pick up the remaining 6" piece of Tinsel stem and cut this into two pieces to use as a wrap to hold the 3 units together, as tightly as possible. You will mash the 3 centers together before wrapping the tinsel stem piece around the centers.
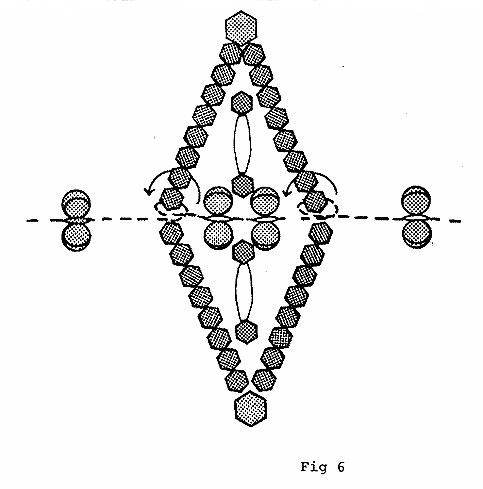
Look at Fig 6, put a drop of glue at the spot where your AB Sunburst will be, immediately adjacent to the outer Star on the final tinsel Stem, leaving this one the full 12" length. Wrap it around the center of one side, another drop of glue, thread another AB Sunburst bead, slip the center star into place in the middle. Work this long Tinsel Stem through the sunburst bead in the middle of the inner star. Another drop of glue, put on your final sunburst bead.
Allow your ornament to dry overnight, then clip off the excess Tinsel Stems.
This ornament is also very attractive when made up with 8mm AB Faceted Beads used every place you have used a 6mm Faceted Bead. Try this in any number of color combinations. Mix and match transparent beads with iridescent beads.