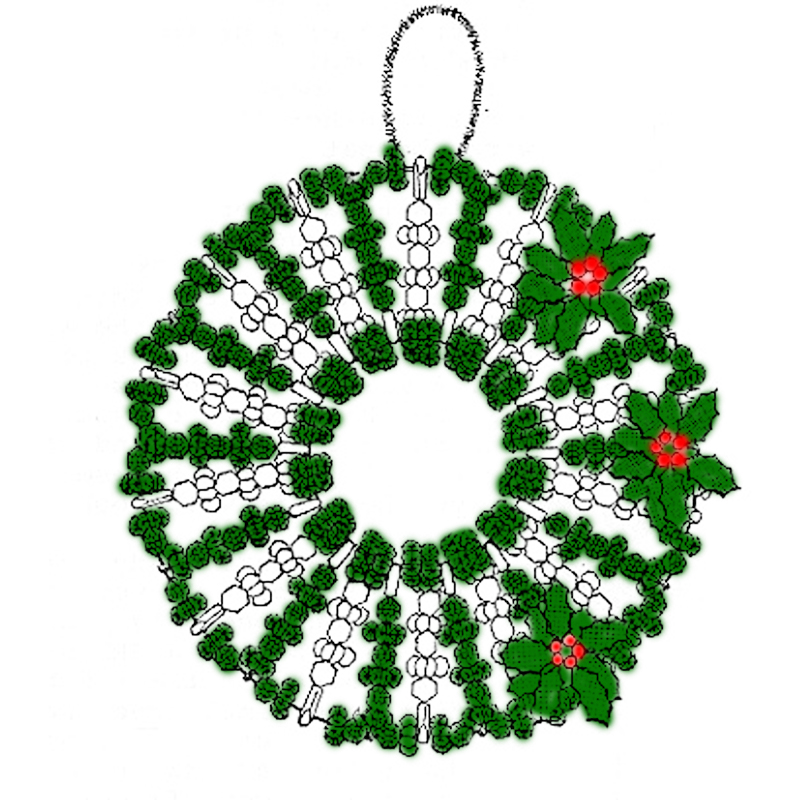
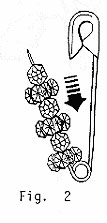
1. Refer to Fig. 2 - Open one of your Size 3 safety pins and * slip 1 - 12mm Starflake bead , 1 - 8mm faceted bead onto the pin. Repeat from * until you have 3 starflake beads and 3 faceted bead on the pin. Close pin. Repeat on the rest of the size 3 safety pins, a total of 28 safety pin assemblies altogether.
2. Now you are ready to begin assembling the front of your wreath. Cut a piece of size 20 ga. wire about 15" long. Make a hook in one end of the wire so your work will not slip off the end. " Slip 2 - 12mm starflake beads onto the wire, add a safety pin assembly. Repeat from * until you have added a total of 14 pin assemblies. You will end with a safety pin assembly.
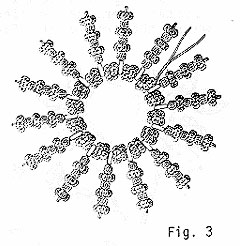
3. Carefully pull your two ends together as closely to your work as possible and twist tightly together, being careful not to break the wire. Make another piece exactly like the one above with the remaining 14 pin assemblies.
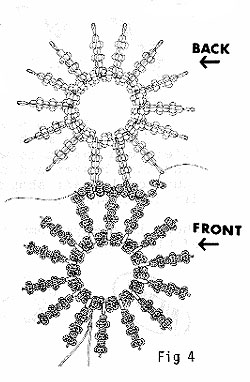
Refer to Fig. 4 - Cut another piece of size 20 ga. wire 24" long. Note the safety pins on the back piece, the beads are facing to the front of the wreath. It will look like you are putting it together incorrectly but you are not. Begin by ** threading a pin from the back piece onto the wire, add a 12mm starflake bead, an 8mm faceted bead, a pin from the front piece, another 8mm faceted bead, and a 12mm starflake bead. Repeat from ** until you have closed the circle. Check your other 2 wire twists
and cut off the excess wire. Now twist wires together on your final circle as closely and as tightly as possible, being careful not to break the wire. Put this piece aside while we make the poinsettias.
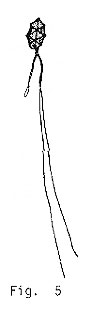
5. Fold a piece of the 18" size 30 ga. wire in two, as shown in Fig. 5. Slip one of the red poinsettia beads onto the folded end of the wire and down at least 3 inches from the fold. Hold the wire firmly and twist the bead tightly 3 or 4 times. This is important! It will give you a firmer flower. Don not hold the bead and twist the wire. Add another red bead onto the longer section of your folded wire, do this until you have added a total of 5 red leaf beads about 1/8" to 1/4" apart. Bring the 5 petals together into a circle and twist the wires together firmly, close your your work. Pull the wires beneath your work. Put this aside for the moment.
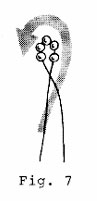
6. Pick up another piece of your size 30 ga. wire and thread 5 opaque yellow beads in the center of this wire as shown in Fig. 7. Twist the ends together so the beads form a tight circle. This will be the center of your poinsettia. Now bend the wires so the circle of yellow beads is at right angles to the wires. Refer now to Fig. 8 which is an elapsed drawing of how you assemble the three parts of your flower. Take the wire with the yellow beads and insert it into the center of your red poinsettia beads. Fig. 9 shows you how this will look.
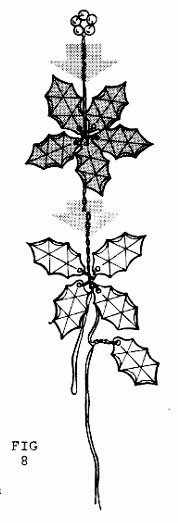

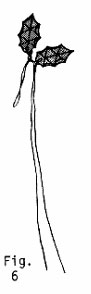
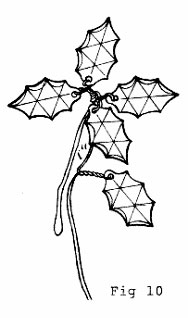
7. Now you are ready for the green leaves - the third part of your flower. Refer to Fig. 10 and begin as you did in Step #5 only you will be using green leaves now instead of the red beads. Also note the fifth and final green bead is not placed close up, but is at least 1" down the stem. Now refer once again to Fig. 8 and finish assembling your flower by slipping the beads shown in Fig. 9 into the center of your green beads. Twist all the wires together all the way to the end. Cover with floral tape. Remember the secret to using this tape is to stretch and pull it down as you use it. Tear it off when you finish. Your first flower is now complete. Make two more just like this.
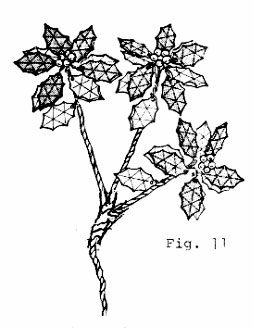
8. Pick up your completed wreath, put a pipestem or glitter chenille, a piece of thread so you will know where the top of the finished wreath is to be. There are a couple of ways of putting the poinsettias on your wreath. One - you can make a spray as shown in Fig. 11 and refer to Fig. 1 and fasten this in place on your wreath. Two - you can fasten each flower to the wreath separately keeping the wires in the middle.
If you are going to make a spray as shown in Fig. 11, start twisting them together no more than 1 and 1/2" below the beads, then place the 3 flowers in the best possible position on your wreath.
If you have enjoyed making this wreath you might want to look at our poinsettia safety pin basket as we use the same flowers in filling this basket.