Holiday Crystal Snowflakes - Free Christmas Craft Project Instructions


* Home  
Beaded Crafts  
Kids Craft Patterns  
Lighted Craft Projects  
Other Craft Instructions  
Jewelry Craft Projects  
Wearable Projects  
Plastic Canvas Projects  
Other Holiday Craft Ideas  
Christmas Crafts  
Halloween Craft Projects  
Fall Craft Ideas  
Easter Craft Instructions  
   
* Contact Us  
   
 
Please help support our site by visiting the sponsors in our ads.


Place your ad or website information on every page of our website. Contact us for more details.

Your donations help us to be able to add more free craft patterns to this site for you. We Thank You.


Holiday Crystal Snowflakes - Free Christmas Craft Project Instructions


Contributed by Tami Rose, with permission of Amanda Formaro

Grow your own snowflakes to use for Christmas decorations. This fun craft is easy enough for children and fun for adults too. The results are breathtaking. Make plenty to hang on the tree or give as gifts!


Materials Needed:
  • 1 wide mouth jar
  • 3 - White pipe cleaners (chenille stems) per snowflake   (Item # 10166-10-A)
  • Boiling water
  • Borax (look in the laundry aisle for 20 Mule Team Borax Laundry Booster)
  • Pencil, straw or small rod
  • String
  • Food coloring (optional)

Instructions

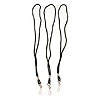
To create a snowflake shape, twist the 3 pipe cleaners together in the center to make a 6-sided figure (picture an X with a line through the middle). Trim as needed so that the snowflake will fit easily into the mouth of the jar.

Important: Adult supervision is needed when using boiling water and Borax. Please keep the Borax out of children's reach.

Fill the jar 3/4 full with boiling water. Add 3 tablespoons of Borax for every cup of water that is used. Stir until completely dissolved. It is ok if some of the Borax settles in the bottom of the jar.

You can now add food coloring to the water to create colorful snowflakes if you like.

Tie the string to one of the ends of the snowflake and the other end of the string to the pencil. Dip the snowflake into the water making sure that the string is long enough to completely cover it with water.

Rest the pencil across the top of the jar. Check to see that the snowflake floats freely not touching the sides or bottom of the jar.

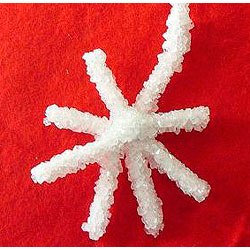
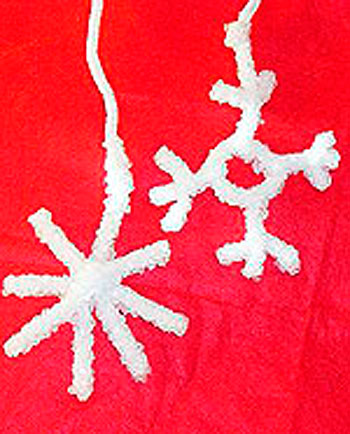
Let the jar rest, undisturbed overnight (at least 8 hrs). The result is a snowflake covered in shiny crystals!


Please Read: After you have finished with this free pattern won't you please be kind and say thank you by clicking on just one of the ads on this page. It doesn't cost you anything and any revenue generated also helps you because it allows us to be able to share this site with you at no chargea and to be able to add more patterns and helpful information for you. We sincerely thank you!
 

Copyright © 2008-2024.  All rights reserved.