1. Glue rattail ribbon or gimp on the inside of the foam wreath base. Hold in place with a rocaille bead on a sequin pin about every half inch. Glue mirror in place on the back and set aside for an hour or two. Spray back carefully, being sure not to hold the nozzle too close to the foam. Even though many paints are designed for floral use and for use on foam, if held too closely, they will still eat the material.
2. Once your wreath is dry, begin to assemble the spokes and beads. First, put the gimp around the outside, using the craft glue to hold it in place. Begin at the top of the wreath and work around until you have completely covered the outside of the wreath. Finish by making a loop for hanging.
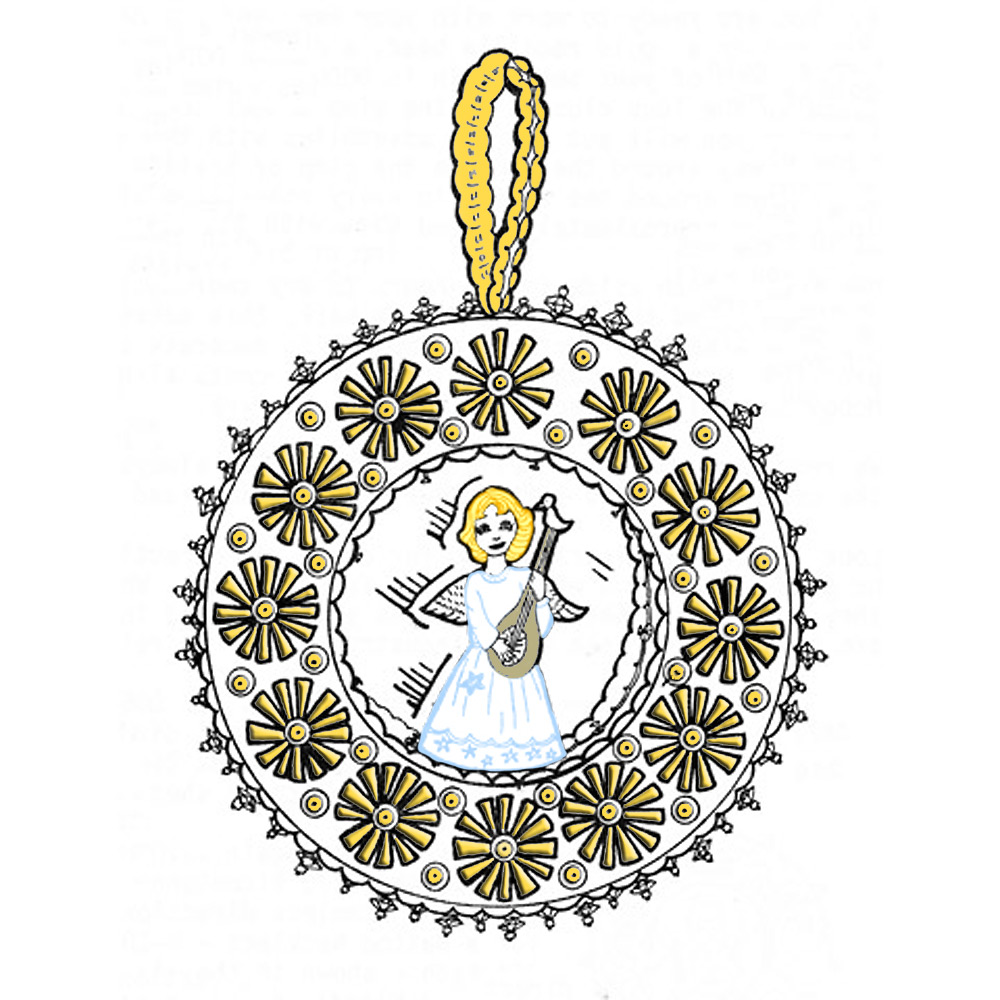
3. Take a sequin pin, dip it in a dot of glue which you have put on a piece of paper for use while you are working on this part of your work. Put a gold rocaille bead on the pin, then a crystal spacer (sometimes referred to as a rondelle) and a large spoke sequin, dip it again into the glue and put it in place on the wreath, continuing around the wreath until you have all 12 large spokes in place as shown on the drawing. Now, you will begin working with the 4mm faceted beads. Put a gold rocaille bead on your sequin pin, a 4mm faceted bead, dip only the end of your sequin pin into the glue, so it will not pullout of your wreath easily, and stick it in place at the top and continue working around the wreath. Note the circles on each side of the large spokes on the flat side of the wreath; there are two sets shown beside each large spoke, and these represent the pins with the 4mm faceted beads which you will place around the flat face of the wreath until you have placed all 24 4mm faceted beads.
4. You are ready to work with your 6mm spacers (rondelles) now. Take your sequin pin, put on a gold rocaille bead, a crystal 6mm spacer and a 5mm cup sequin. Dip the end of your sequin pin in glue and push into place in the loop closest to the gimp hanger loop at the top of your wreath itself. Remember, you will put 2 pin assemblies with these 3 pieces on each pin, side by side, all the way around the side on the gimp or braid. After the first two rows are put in, space them around the wreath in every other loop of your braid or gimp. There should be 24 rows, approximately, around the outside of your wreath.
5. Set your wreath aside for 24 hours to dry thoroughly.