1. Make a mark 3/16" from the tip of the pliers with a permanent marker pen so that each time, the loop will be the same size. In time, this mark will wear off.
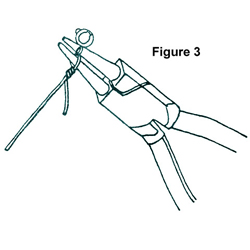
2. Cut a piece of wire 6" long. Place your pliers 1/2" from the end. Make a loop (Figure 2) by wrapping the wire around the back side of the pliers (1 loop only). Place the spring ring clasp into the loopo. Place the pliers back into the loop (Figure 3), with the short end of the wire at a right angle to the long piece of wire. Holding the pliers firmly against the wire and using your left thumb, make three tight wraps around the long piece of the wire, going toward the long end of the wire (Figure 3). Trim excess wire as close to wrap as possible.

3. Place a 3mm bead, a 6mm bead and another 3mm bead on the wire. Place the pliers about 1/16" from the 3mm bead. Make a loop (Figure 2) by wrapping the wire around the back side of the pliers (1 loop only). Place a plaque spacer into the loop at this point. Place the pliers back into the loop. Using your left thumb, make three tight wraps toward the 3mm bead (Figure 4).
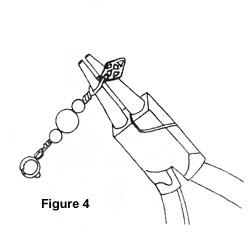
Do not forget to place the filigree plaque into the loop before you make the three wraps.
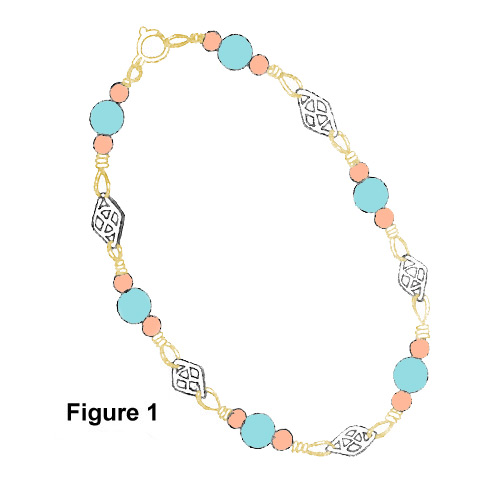
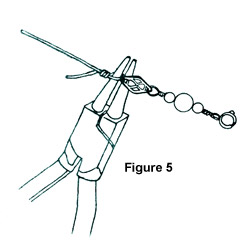
4. With the remaining piece of wire, make a loop (Figure 2) by wrapping the wire around the back side of the pliers. Place the opposite end of the plaque spacer into the loop. Place the pliers back into the loop ( Figure 5), with the short end of the wire at a right angle to the long piece of wire. Holding the pliers firmly against the wire, use your thumb to make three tight wraps toward the 3mm bead (Figure 4). Repeat from Step 3 through Step 4 until your bracelet is approximately 7 1/2" to 8" in length. This should be 6 plaque spacers and 7 6mm beads long.
5. End your bracelet with a 2mm, 6mm, 3mm bead sequence by making a loop and three wraps as before, without placing a plaque spaer into the loop. This will form the loop which the 7mm spring ring clasp will hold to. If you wish, this loop may be slightly larger.
To make earrings or a necklace, continue until desired finished length is obtained. Note: These bracelets can be made without the 3mm beads or with any combination of bead shapes or colors.