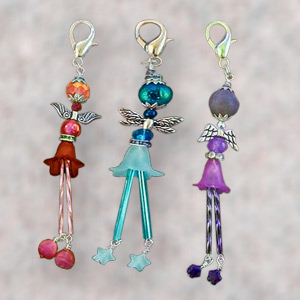
I can just see these little fairies in so many scenarios!
There are a number of different things you can use to connect your fairy dangle to something, so the first thing you need to do is decide how you are going to use your fairy dangle.
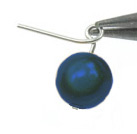
If you wanted to make earrings out of them you would need a pair of earrings. If you choose post styles be sure that they have an eye on them to connect your fairy to.
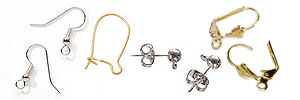
Earring Findings
If you prefer to clip them onto something, like the displays are, then you will need a clasp. The displays use a Lobster Clasp.

Clasps and connectors
You may need some jump rings, depending on what sort of connectors you choose. Some clasps have a jumpring already included. You can use colored ones or traditional gold or silver colors.

Jumprings
Adding a few filigree bead caps will add an extra level of dazzle to your fairy. Choose a size that works well with your bead. You don't want your beadcap to be too large or too small. It should surround your bead like a glove.
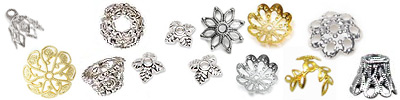
Bead Caps
Next, you will need an assortment of beads. Almost any bead will work for our fairy dangles and you do want an assortment of larger and smaller beads. Using beads with different textures or patterns will add a level of interest to your fairy. Here are a few suggestions to use.
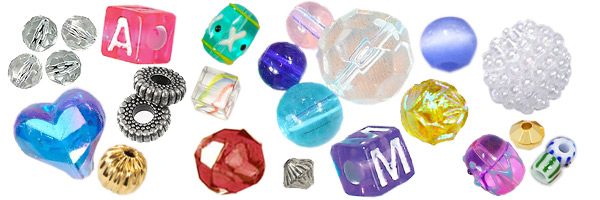
Bead Ideas for Fairy Dangles
Another bead that you will need is a long, slender bead to be used for your fairy's legs. Our display fairys use twisted bugle beads but you could easily use rice beads, bone beads, metallic tubes or spaghetti beads. For rice beads you will need to use 4 to 8 beads, depending on the length of the bead and how long you want to make her legs. Just about any elongated shape bead will do for this.

Ideas for Long Beads for Fairy Dangles
The last type of bead you will need is a bell bead or a flower bead, that will be used for the fairy's skirt. These beads are named from the shape that they resemble. As an alternative, if you have shallow flower beads you can nest 2 or 3 of them together to make a skirt. See the stack of pink beads in the photo for an example. It adds a whole new dimension to your little fairy.
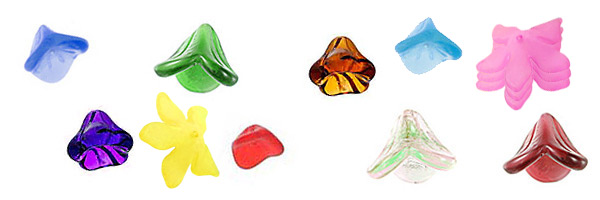
Beads for Skirt on Fairy Dangles
Next, you will need some fairy wings. You can use small wings like the ones pictured below or you can use crystal teardrop beads for a bit of a different look.

Angel Wing Beads
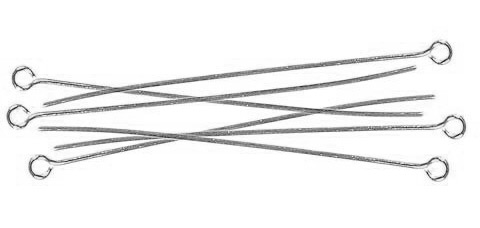
You will also need 2 head pins and 3 long eye pins for each fairy that you make. We used 3 inch eye pins and 1 1/2" head pins.
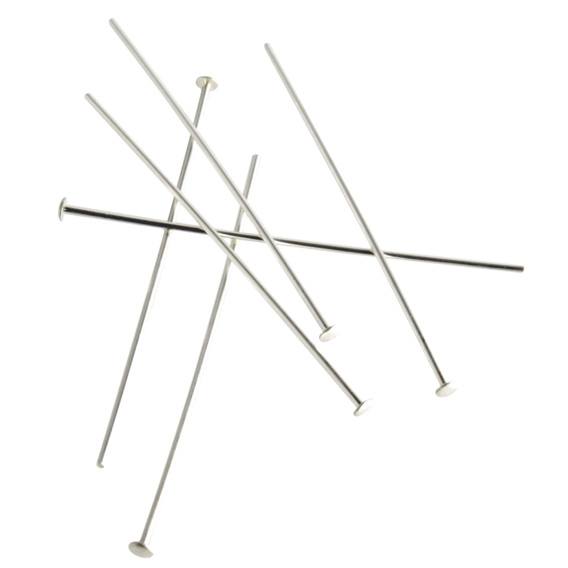
Head Pins for Fairy Feet
Top of Fairy: Begin with an eye pin and thread on a bead cap, then add your bead that will become the fairy's head, and then another bead cap. The bead caps should sandwich the head bead. You can omit the bottom bead cap if you prefer. Next, add a very small bead, like about 4mm to 5mm. Your wings will be be next. Some people like to turn them upside down for a different look. Either way is just fine. Now another small bead, maybe 6mm, and then a small spacer bead. This serves as a waist band or belt. The spacer bead can be jeweled or not. If you are making several then you might want to experiment with different spacers. Last is to add the flower bead for her skirt. With your pliers, twist the end of the eye pin into a circle and get it as tight and up as close as you can inside your skirt bead. Trim any excess wire. Set this pin aside for now.
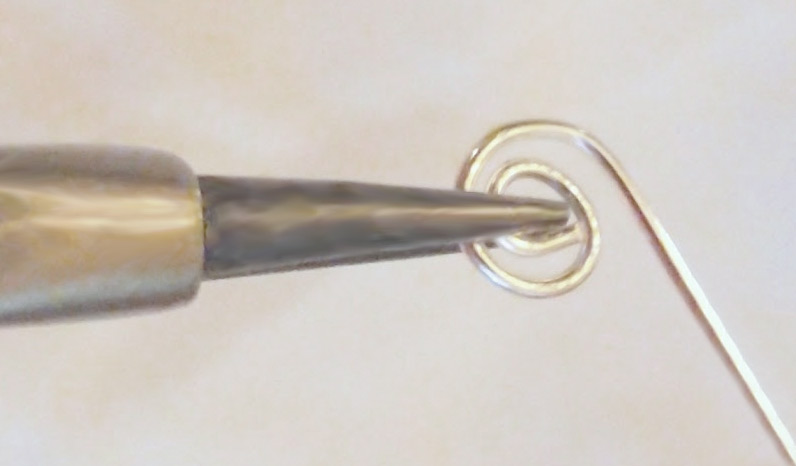
Rolling Wire into a Circle
Legs: Now we will make your fairy's legs. Depending on what type of bead you choose, thread on as many beads as needed to fill your eye pin, leaving atleast 1/2" of the wire unused. If you are making several fairys you might want to try different types of beads on each. We used twisted bugle beads on our fairies. We probably should have made some with other types of beads on the legs too so you could see a variety. We will just have to save that for another project.
Working with one leg at a time, insert the end of your leg wire into the circle you made in the top part of the fairy and wrap it around several times to secure and cut excess. Repeat with the other leg. Be sure not to wrap them so tightly that they don't wiggle just a little bit.
Using your head pins, thread on a bead. This will become your fairy's feet. Insert the end of your head pin into the eye hole at the bottom of the fairy's leg. Make a loop very close to your foot bead and then wrap the wire around the stem a couple of times. Cut off excess wire and use your pliers to work the end of the wire into the other wire so that it doesn't snag on anything. Repeat for the other foot.
Wrapping your wire
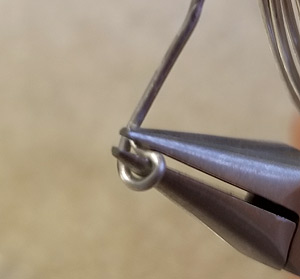
The last step is to attach the top of your fairy to the type of clasp or earring that you chose. Open a jump ring and insert it into the eye at the top of your fairy and into the eye of your clasp. Twist the jump ring closed and straighten it.
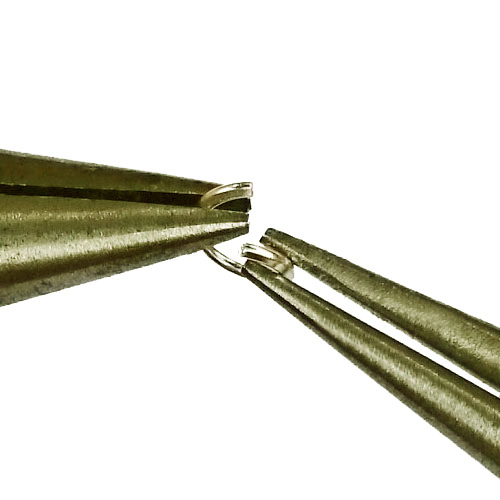
Opening a Jumpring
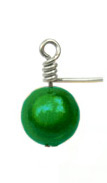
Isn't she cute!