| Place your ad or website information on every page of our website. Contact us for more details. |
|
|
| Your donations help us to be able to add more free craft patterns to this site for you. We Thank You. |
|
|
|
|
|
Tiny Beaded Angels - Christmas Angel Jewelry - Free Christmas Craft Instructions
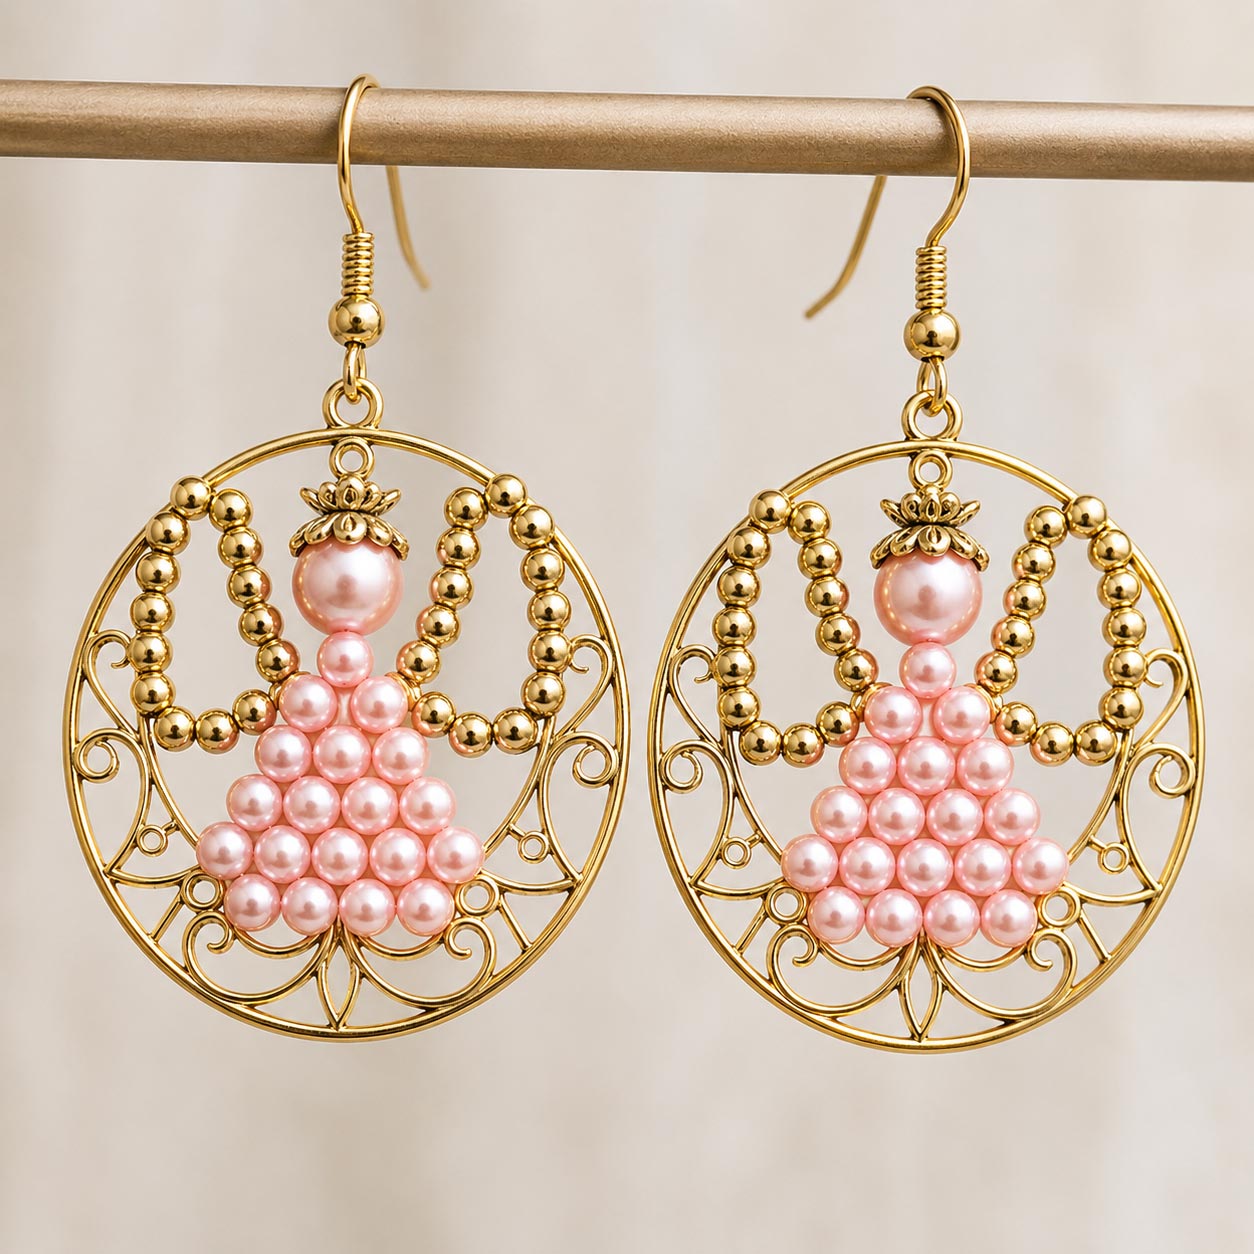
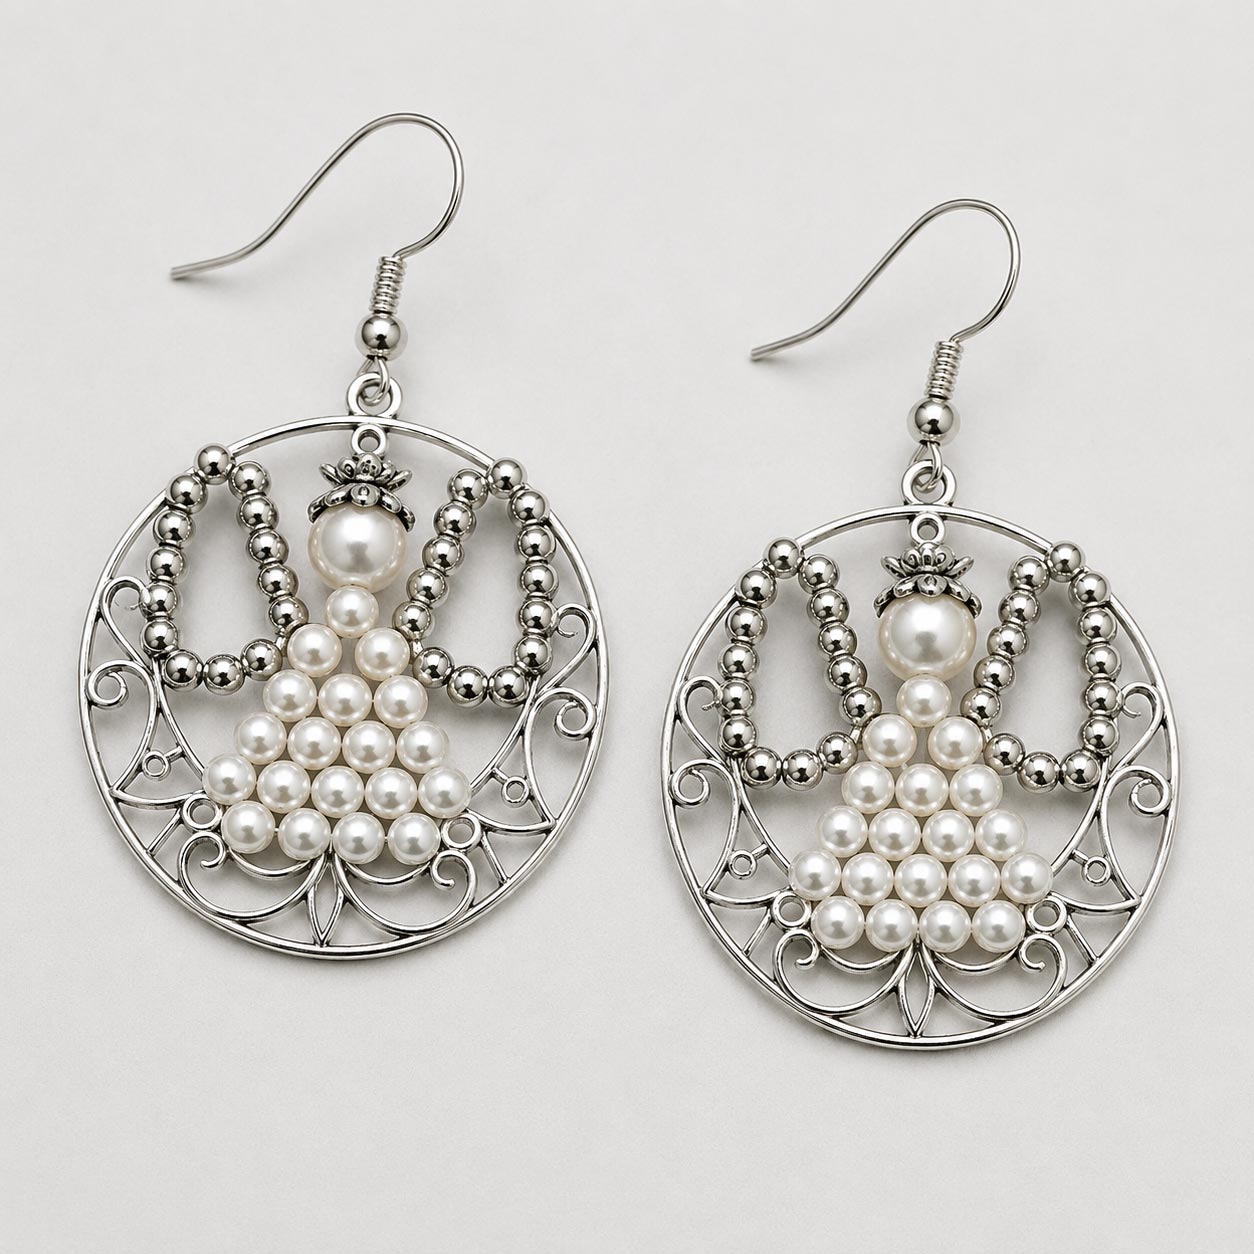
Make Christmas tree ornaments, necklace pendants, bracelet charms or a lovely pair of angel earrings with this free Christmas jewelry pattern. You will be enchanted by its beauty and the possibilities. The delicate beaded angel design makes beautiful angel jewelry for yourself and thoughtful handmade gifts for family and friends.
Don't stop with earrings! Make a single beaded angel as an angel necklace pendant, add a smaller version to a bracelet as an angel charm, or create several angels for a coordinated jewelry set. Change the bead colors and finishes to give each angel its own personality. Traditional white or pearl beads create an elegant angel, while pinks, blues, birthstone colors, metallic beads or a favorite color can turn the same design into something much more personal.
These beaded angels aren't limited to jewelry, either. Add a ribbon or ornament hanger to create a handmade angel Christmas ornament, use small angels as package decorations or gift toppers, or make one as a keepsake for someone special. Try making angels in wedding colors for bridal gifts, soft colors for a new baby, birthstone colors for family members, or colors chosen especially for the person receiving the angel.
The design can be elegant, whimsical, traditional or colorful depending on the beads and findings you choose. Make a matching pair for angel earrings, mix colors for playful Christmas jewelry, or create individual angels as small gifts and keepsakes. Once you've made the basic angel, experiment with your own bead combinations and see how many different looks you can create from the same pattern.
Share your beaded angel earrings with us!
|
|
| Note: For your convenience and to assist you in being able to locate the material required for this project, some or all of the materials listed may be linked to other websites or contain affiliate links. All links in the material list will open into a new window so that you don't lose this pattern page. |
Materials Needed:
|
|
|
Instructions
Make in either Gold or Silver finish. Use the same finish for all of the supplies noted with a (*). Remember if you are making more than 1 Angel to Increase the supplies needed. This makes a lovely pendant or pachage decoration as well as earrings for an inexpensive gift. Make it in various sizes by increasing bead sizes such as 6mm with a 12mm head.
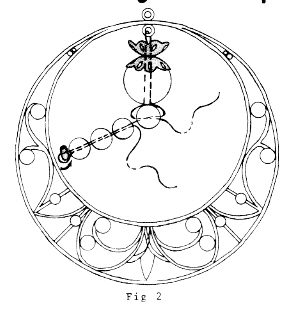
1. Take the 18" piece of 28 gauge wire and thread it through the inner loop of the hoop so that you have half of it to work with on each side. Do not bring this up tight against the loop. See Fig. 2
2. Refer to Fig. 2 and slip the bead caps on both wires as shown with one cap up and one cap down for the halo effect, add the 6mm pearl for the head.
3. Separate the two wires and add a 3mm pearl to the right wire, bring the left wire through from the opposite side. Look closely at Fig. 2 Bring this up tight against the 6mm pearl.
4. With the left wire add 3 - 3mm pearls and a seed bead, turn the wire and bo back through the 3 - 3mm pearls, repeat on the right side, these are the arms of our angel. See Fig. 2.
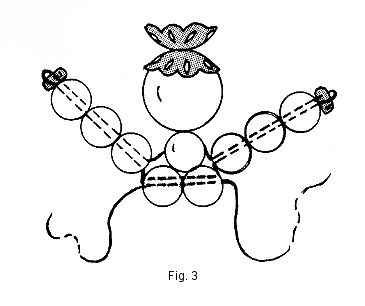
5. You are now ready to start the body. In our drawings, for clarification, we have omitted the view of the hoop but it is still there. See Fig. 3 which shows the addition of the next two 3mm pearls for the next row and going crossways through the pearls with each wire in a ladder effect. On the Third body row add 3 - 3mm pearls. On the Fourth body row add 4 - 3mm pearls. On the Fifth body row add 5 - 3mm pearls. On the Sixth body row add 6 - 3mm pearls. This completes the body of our Angel. Please note to make a larger Angel at this point you would continue adding rows to the body of the Angel in the same manner.
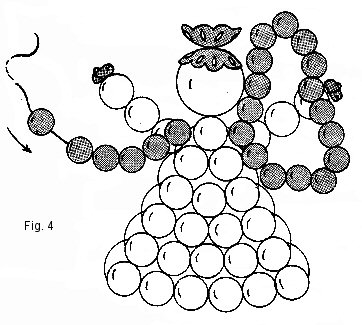
6. Refer to Fig. 4 and work the wire back up each side going through the loops until you have reached the second row of body pearls working on the back side of the Angel. Thread 16 - 3mm plated beads to form the right wing as shown in Fig 4. Twist the wire as tightly as possible and leave for a moment. Fashion the other wing in the same manor, be certain to work the ends of the wires into the bead work before trimming off as close as possible. Your LITTLEST ANGEL is now complete.
|
|
|
|
|
| Please Read: After you have finished with this free pattern won't you please be kind and say thank you by clicking on just one of the sponsors on this page. It doesn't cost you anything and any revenue generated also helps you because it allows us to be able to share this site with you at no charge and to be able to add more patterns and helpful information for you. We sincerely thank you! |
| Subjects and Terminology Related to this Pattern: pattern patterns instruction instructions free pattern free patterns free instruction free instructions pattern free patterns free instruction free angel earrings, angel earrings pattern, beaded angel earrings, beaded angel earring pattern, pearl angel earrings, angel jewelry, angel jewelry pattern, beaded angel pattern, Christmas angel earrings, Christmas earrings, Christmas jewelry, Christmas jewelry pattern, free Christmas jewelry pattern, free jewelry pattern, beaded jewelry pattern, Christmas tree ornaments, angel Christmas ornament, beaded angel ornament, angel ornament pattern, necklace pendant, angel pendant, bracelet charm, angel charm, bead earrings, handmade angel earrings, DIY angel earrings, Christmas crafts |
|
|





 2 - Small Bead Caps
 2 - Seed Beads